|
|
Documentation Under Construction This documentation is updated weekly. Please try again later. We apologize for any inconvenience. |
Overview
Colonies are are a way of distributing chunks of processing across a network of processors. CLIP supports colonies by means of the Master/Submaster/Slave model. This section describes ways of setting up a distributed application.
In traditional programming, the Global System is partitioned into independent sub-systems (programs, .exe's, etc) which communicate via third-party middleware libraries or harnesses. This partitioning designing the system at the start, with each sub-system being developed by a separate team. In CLIP applications we design a single 'logical' application with all of the circuitry required to perform the functionality of the complete system. Once this circuitry is complete we decide how it is to be partitioned. In most cases a physical partition is not required, but we can still distribute the application across a network using a virtual partition.
We perform both the physical partitioning and distribution by creating a colony of Processes, where each process contains a sub-set of the application circuitry. Each Process is a separate .exe (its actually a .lib that is gets embedded into a .exe) that communicates via CLiP, and thus can run on any processor (or even the same processor) that has a common network link.
Autonomous - Single Process - single Partition
In an autonomous application all circuitry is run in a single process with no physical or virtual partitioning, on a single processor (can be a multi-core processor). This is useful for debugging or for simple applications. See Creating an Autonomous Process.
Master/Slave - Single Process - Virtual Partition
Virtual partitioning, allows the application run duplicate 'identical' .exe's, each running on separate processors, but each capable of performing any/every part of the system. The master .exe is responsible for deciding which slave .exe is to perform which calculation and when. This is done at run-time, for every method each time it runs and depends on a number of factors: processor loading, data distribution etc.

This virtual partitioning is achieved by creating a single Process but linking two .exe's a master and a slave. Each slave is identical, and any number of slaves can be run, with the master farming out jobs to each to balance the load across the network.
To create a Master/Slave application, we create the circuitry, containers and colony in exactly the same way as for an Autonomous Process except we need to nominate Slave-able Methods and tweak the 'Process' parameters.
Slaveable Methods
Slaveable methods are those methods that we wish the master .exe to farm out across the network (non-slaveable methods will always run on the master), an application with no slaveable methods is equivalent to an Autonomous Process.
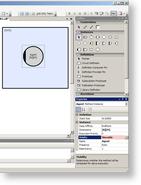
Any method can be made slaveable by simply setting its Mobility property to 'Slaveable', the method will change to grey.
In addition each object that the method connects to directly needs to have its Scope property set to 'Public'.
NB. a collector method  has a 'hidden' collector, collecting the two trigger connections, and thus only objects connected via auxiliary connections are connected directly.
Colony
Creating Colonies requires a little bit more thought, although the process is simple.
- Create a CDL entry with an appropriate name.
- Drag a Colony from the Toolbox (Accretions) onto the blank page.
-
- The Type name to be added for the 'Associated Container' is the name of the top container.
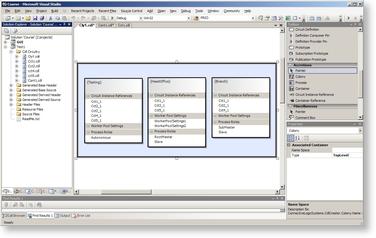
- Drag a Process from the Toolbox (Accretions) on to the colony (More than one process can be defined in a colony).
- Add a 'Circuit Instance Reference' to the Process.
-
- The Name of the instance must match the name of an existing Circuit Instance defined in a container.
- Add a 'Process Role' (eg Autonomous, Root Master, Sub Master, SLave) to the Process.
- Modify the Process and Process Role Properties as required.
To create a new colony we simple add a new CDL entry to the Solution Explorer (see Create a Named CDL entry) and drag a 'Colony' object from the Toolbox.
NB the Blueprint Project Wizard will create a default Colony 'MyAccretion'.
Process
To create a new Process simply drag a 'Process' object from the Toolbox on to the Colony.
NB the Blueprint Project Wizard will create a default Process 'Process1'
Blueprint/CDL supports multiple Processes and Colonies. However, Colonies are not 'named' apart from the CDL entry name. Thus Processes created within a Colony do not inherit the Colony name, and must therefore be uniquely named across the project.
Process Parameters
When configuring a Master/Slave process we need to setup the Process properties, to inform the Code Generator to include all of the code appropriate to Master/Slave .exe's into the process library. Below only those parameters that are commonly required are described (see Process Attributes for a full description of all of the others). Once compiled this single library can be linked with the CLIP libraries to form either/both Master and Slave executables.
Although the Master will run without any Slave executables (see Min Num Slaves below), at least 1 Slave executable is usually required to run the complete functionality, more slaves simply make it go faster or share the load.
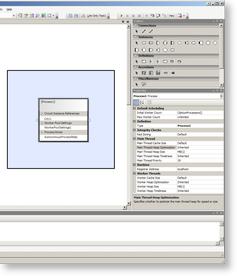
After adding a RootMaster and Slave Role to the Process Object, each can be configured separately, through the Process Role Attributes.
Instance Properties (see also Run-Time Attributes)
| Parameter | Notes | Set To |
| Heap Size | Size of the memory block CLIP reserves for Methods/Threads and Records. The size of Slave heap is dependent on the Slave-able Methods and their data storage. Whilst, Root Masters hold the definitive copy of all Records and Method State. | As required |
| Min Slave Count | Root Master Only In some cases there is no-point in running the application unless there are sufficient Slaves to perform the basic functionality, setting Min Slaves will cause the Root Master to wait until that many Slaves have connected before starting any processing. Setting a value of 0 will allow Threads running on the Root Master to execute, even if no Slaves are available to handle the Methods |
As required |
RootMaster/SubMaster/Slave - Multiple Process - Physical Partition
Physical partitioning, allows the application to be composed of 'non-identical' .exe's, where each exe has a dedicated function.
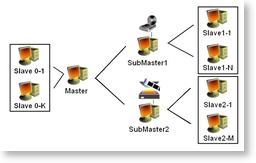
This usually arises when part of the application needs to run particular functions on particular hardware (ie. specific hardware components/devices). We can create these multiple partitions by creating multiple processes, each with its own sub-set of circuits.
Each process becomes a separate .exe, that can be run on a specific platform. The physical partitions are the RootMaster (sometimes referred to as the Master) and SubMasters Processes and .exe's. Each physical partition can have Virtual Partitions (Slaves).
To create the Processes we need to decide what circuitry needs to be run in each partition and assign it to a Process. All circuits in the application containers need to be assigned to at least one process. There should be only one Process containing a Root Master and at least one containing a Sub Master (but not both), each Root Masters/Sub Master can contain independent Slaves.
Slaveable Methods
Slaveable methods are defined in the same way as for Master/Slave Processes above.
Process Parameters
The Process parameters are set up in the same way as for Master/Slave processes. However, the actual values used need to take into account the application memory partitioning over the Root Master, Sub Masters and Slaves.
Instance Properties (see also Run-Time Attributes)
| Parameter | Notes | Set To |
| Heap Size | Size of the memory block CLIP reserves for Methods/Threads and Records. The size of Slave heap is dependent on the Slaveable Methods and their data storage. Whilst, Masters hold the definitive copy of all Records and Method State for their Slaves. | As required |
| Min Slave Count | Root Master, Sub Master Only In some cases there is no-point in running the application unless there are sufficient Slaves to perform the basic functionality, setting Min Slaves will cause the Masters to wait until that many Slaves have connected before starting any processing. Setting a value of 0 will allow threads running on the Masters to execute, even if no Slaves are available to handle the Methods |
As required |
| Registrar Address | Root Master, Sub Master, Slave Only This is the TCP/IP address of the Registrar, where Sub Master and Slave applications can discover the TCP/IP address of the required Master. Root Masters usually act as registrars for themselves and their Slaves, thus Root Masters can be left at the default 'localhost'
|
localhost/Address of the Root Master |
Builds
The Blueprint code generator will generate a single library containing the code for all of its Colonies and Processes, for each of the Build Configurations. Developers can build either
- The Role Specific Build Configurations for Root Master, Sub Master etc. which will generate separate Role Libraries (one for each role). In this case the Role dependent executables only need to be linked with the appropriate Role Library.
- The Generic Debug/Release Configurations. In this case the Role dependent executables (one for Role) needs to be linked with Generic Library and the appropriate CLIP libraries.
Complete Application
The complete logical application needs all of its circuitry to be instantiated somewhere on the network, thus at least one copy of each Master/SubMaster/Slave is normally required. However, careful design can make parts of the system optional.
Eg.
A recorder circuit, which was a pure Client (has no sub-client circuits shared with the rest of the application) could be built into a separate SubMaster Process. Although the 'complete' logical application requires the recorder, the physical application need not be complete. Hence the Recorder SubMaster need not be run (eg. to simplify debugging or if the hardware is not available to record to), or could be started at a later point.
Similarly the Recorder SubMaster could be stopped, without affecting the rest of the application.

 Click to enlarge